Docker is a platform where developers build, run, and deploy applications with containers. A container is a standard unit of software that packages up code and all its dependencies so the application runs quickly and reliably from one computing environment to another
Containerization can be defined as the use of containers to deploy applications. The container interacts with its own private file-system which is provided by Docker Image. A Docker Image is a compendium of files, codes, dependencies, and other objects needed to run an application. Docker uses a UNIX system to build applications. When a docker image is being built, it can then be pushed to a remote Docker repository such as Docker hub, which can then be deployed to any cloud platform like AWS, GOOGLE CLOUD, etc. Github repositories also can be linked to a Docker hub account.
In this article, we will create a bootstrapped react application and dockerize it. First and foremost, you have to install docker to your local machine, click here. I assume you already have node, npm, or yarn installed to your local machine. Now let's continue!
Step 1 : Create a react app by running this command:
npx create-react-app docker-tutorial
Step 2 : cd into the docker-tutorial directory and start the app by with the command below:
npm start /* Or Yarn start */
Step 3 : Create docker files:
touch Dockerfile Dockerfile.dev
Open the files and paste the code below:
# this indicates the version of the node image you wanna use. i.e Use the version of this node image.
FROM node:alpine


# Tells Docker to create this directory such that subsequent commands will use the directory.
WORKDIR /app


# Copy our package.json into the /app directory we created. It tells node what modules we wanna use.
COPY package.json  /app

# To install the dependencies the app needs inside of the Image.

RUN yarn install

# It copies everything in the local directory into the image in the code directory */
COPY . /app

# To navigate the application's entry point and run the image.

CMD ["yarn","run", "start"]
Now, you might have seen Dockerfile.dev before. The difference between Dockerfile and Dockerfile.dev is the former is used for production build while the latter is used for a development build. For best practice, it's recommended that two dockerfiles are used, one for development; and the other for production.
Step 4: Create a docker-compose file
touch docker-compose.yml
Open the file and paste the code below:
version: "3.8" #We specify a version for Compose. Make sure Compose is compatible with Docker
services:
  client: #Define the client service so we can run it in an isolated environment.
    stdin_open: true
    build:
      context: .
      dockerfile: Dockerfile.dev #The client service requires a docker file to be specified. For development, we’re going to use the Dockerfile.dev file.
    ports:
      - "3000:3000" #Next, we map the port 3000 to Docker. The React application runs on port 3000, so we need to tell Docker which port to expose for our application.
    volumes:
      - "/app/node_modules"
      - "./:/app"
Docker Compose is a tool for defining and running multi-container Docker applications. With Compose, you use a YAML file to configure your application’s services. Then, with a single command, you create and start all the services from your configuration. If you have not installed docker-compose, kindly click here. You can also use other tools like Kubernetes
Step 5 : Create a docker ignore file:
touch .dockerignore
.dockerignore works like .gitignore, we get to add files that we do not want to push. Open the file and paste the code below:
node_modules
build
.dockerignore
Dockerfile
Dockerfile.prod
Step 6 : Now that we're done configuring our files, let's run the application:
docker-compose up
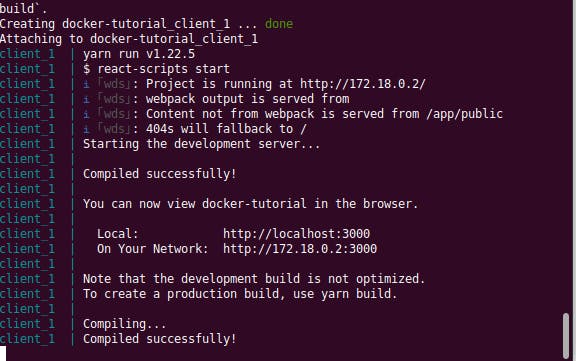
If all other things being equal, you should see this in your terminal:

Now go to your browser and type localhost:3000
Wow! Congratulations, your app has been dockerized successfully!
Now we’re ready to develop our React application. If at any time you run into any issues, check out the GitHub repository for this article. Also, check out this Github repository for Docker cheatsheet
Do like, share, and drop feedback. Thanks for reading!

